
Forms: Mapping to multiple constituent records and creating relationships
In this article:
- Create or update multiple constituent records through your form
- Create a relationship through your form
- Add a related gift to an additional constituent
Create or update multiple constituent records through your form
If you're looking to capture information for additional constituents entered through your form and you want to create a separate record for them, you can add additional Name and Contact Information fields in the form. Your form might look something like this:

You can then map fields for up to ten (10) additional constituents by selecting the Map to 1 more constituent button in your form’s mapping, as shown here:

You’ll then be able to implement the mapping for each of the fields. Click the Map a field button:

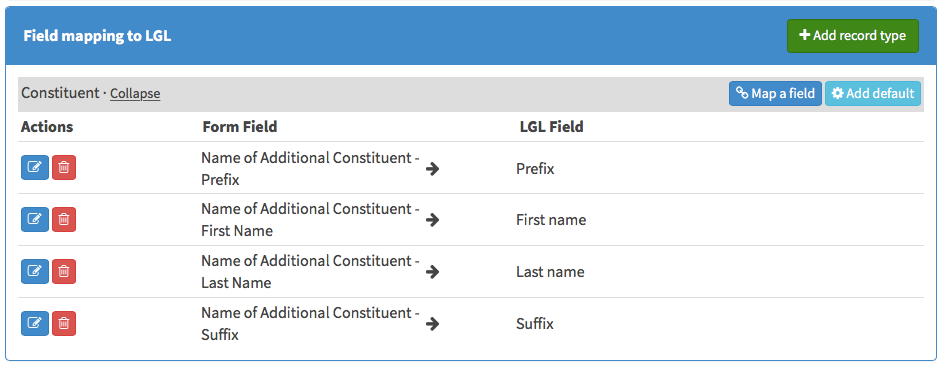
Map the name of your additional constituent to the “Main/full Name” field (this will bring in the full name, including any prefix or suffix data, for Constituent #2), as shown here:

Another option is to map the additional constituent's first name and last name, other contact information such as mailing address, email address, and phone number, and any other fields you want, by clicking the name of the field/s under Form Fields on the left side of the page, as shown here:

Set up the mapping so that the “Name of Additional Constituent” field is mapped to “Main/Full Name” and click the Save button:

The name mapping for Constituent #2 will look something like this:
You can then use the +Add record type or the Form Fields column on the left side of the page to add any additional mappings for the constituent #2 record, such as address, phone number, email address, or event records.
Matching new form submissions to existing constituent data
When there is a chance your form submissions will update existing constituent records, be sure you select the appropriate matching options at the top of your Forms > LGL Integration page, as shown here:

For the best possible matching to occur, consider making the name and email address fields required in your form so that whoever is submitting the form will be sure to provide that data:

Create a relationship through your form
Creating a relationship through your form requires adding one or more additional constituents to your form mapping and defining how you want to relate them to one another. Both directions of the relationship need to be set up, from constituent #1 to constituent #2, and from constituent #2 to constituent #1.
NOTE: An example of a relationship you may want to set up in this way is from child to parent and parent to child, where you are setting up both constituent records within your form and connecting them via the relationship.
To set up a relationship between constituent #1 and constituent #2, click the Add relationship button in the Constituent #1 tab of your form mapping:

Add the relationship type, make sure the relationship is connecting to “Constituent #2”, and save:

Then click on the Constituent #2 tab to set up the reverse direction of the relationship from constituent #2 to constituent #1, and save:

Once you have set up these relationship directions, your form submissions will create records if they don’t already exist for each child and their parent, plus the appropriate relationship types for each.
It’s always a good idea to test your form (it is possible to do this using the method described in the article, even if your form is not collecting payments) to be sure the data is coming in as you expect.
IMPORTANT: Always remember to click the Save & Finish button to save changes to your form’s mapping before navigating away from the page.

Add a related gift to an additional constituent
Once you have added an additional constituent to your form, if constituent #1 has a gift mapped you can then add a related gift for the additional constituent, such as a soft credit or peer credit.
In the gift mapping for Constituent #1, click the Related Gift button, as shown below:

Select the related gift type (Soft Credit, Peer Credit, In Honor, or In Memory), choose the percentage of the amount, and set the acknowledgment mailing template (if applicable). Then click Save.