
Build and map a volunteer hours form
In this article:
NOTE: New LGL Forms functionality is now available to help you create better-looking forms using Enhanced Themes. This includes simple donation forms with buttons for amount fields (and recurring schedules), a multi-step online donation widget, improved styling options, and mobile-friendly sizing. You may find opportunities to improve the donor experience by using this new functionality. You can learn more here, and also keep in mind, the information shared in the article below is relevant and current, and instructions for mapping (integrating) your form have not changed.
Overview
A great way to track and compile volunteering hours for your organization is to provide an LGL form for your volunteers to submit their hours through. When a volunteer submits their hours this way, a volunteering record, which includes the date, hours, and volunteering category, will be created for them in LGL. You’ll then be able to search and report on that data as needed.
Follow the instructions provided in the sections below to build a form to accomplish this and map it to capture the data accurately.
NOTE: For a volunteer record to be created, the volunteer category and volunteer hours are both required, and the volunteer hours must be greater than 0.
Build the form
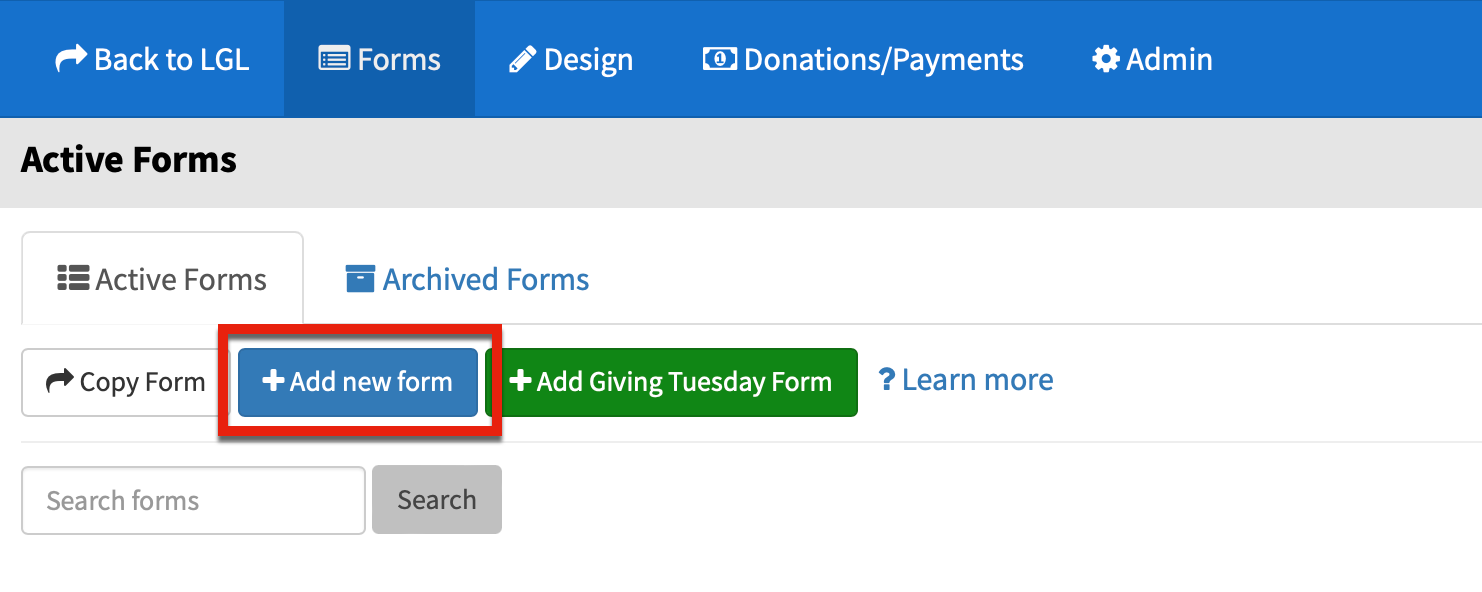
To build your form, go to your LGL Forms account and, from the Forms page, click the Add a form button.
Then name the form and create it. Our sample form is named “Submit Volunteer Hours”.
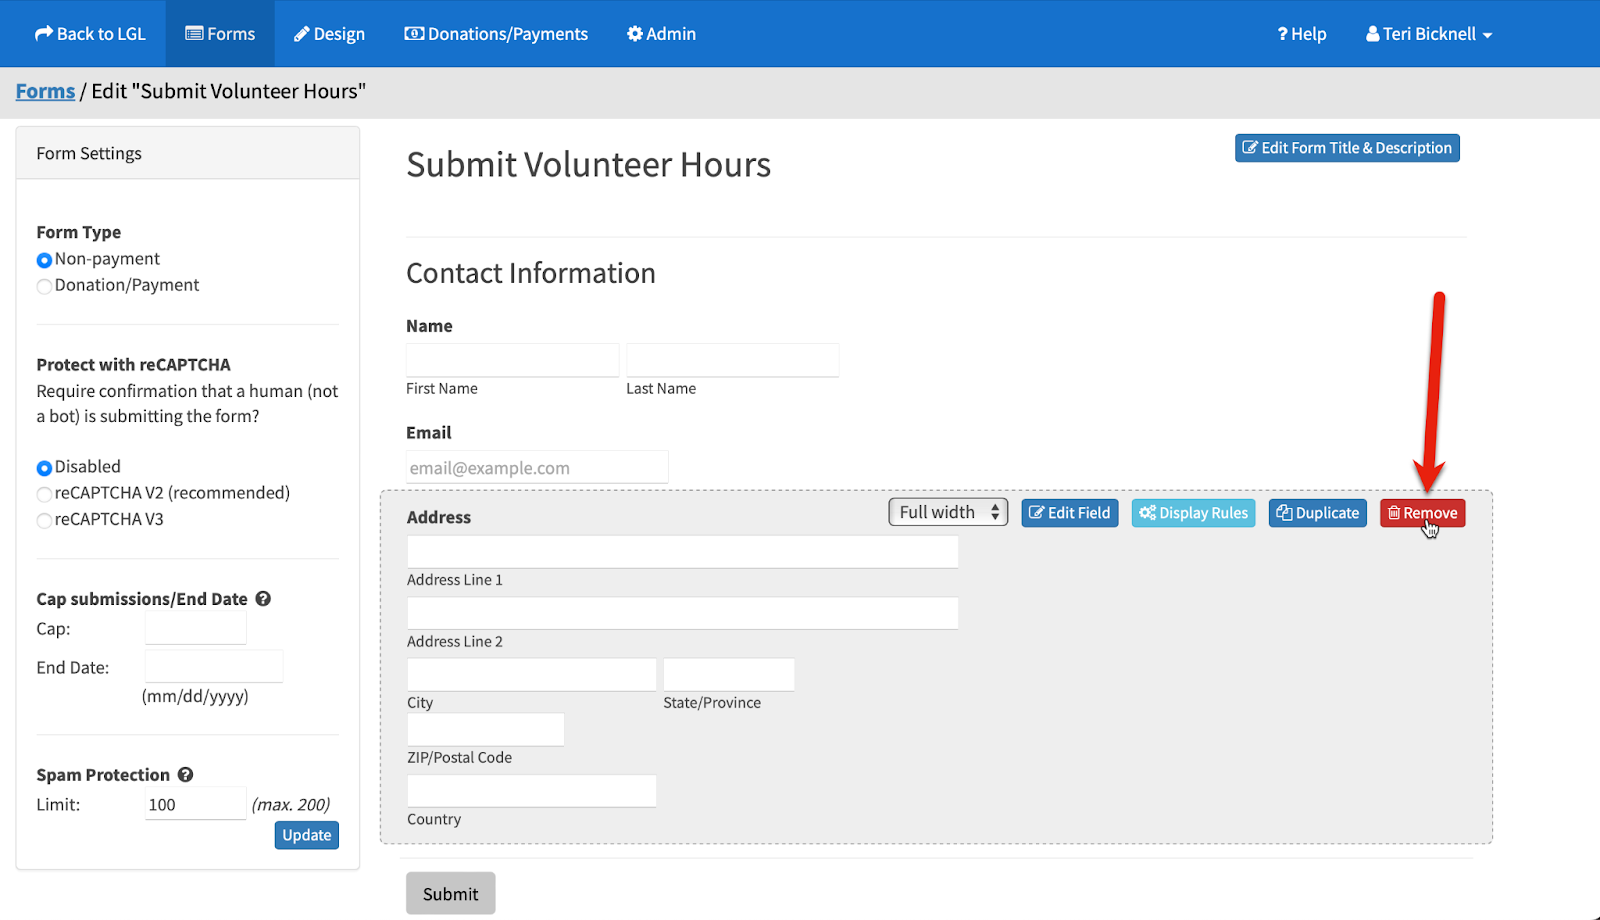
By default, a Contact Information heading, plus fields for First Name, Last Name, Email, Address, and the Submit button are included when you create a new form. But you may not need all of these. If you want to remove the Contact Information heading or the mailing address field, you can do so by hovering your cursor over the field and clicking the Remove button, as shown here:
Add the required fields
To collect volunteer hours, at a minimum add fields to capture the date, hours, and volunteering category.
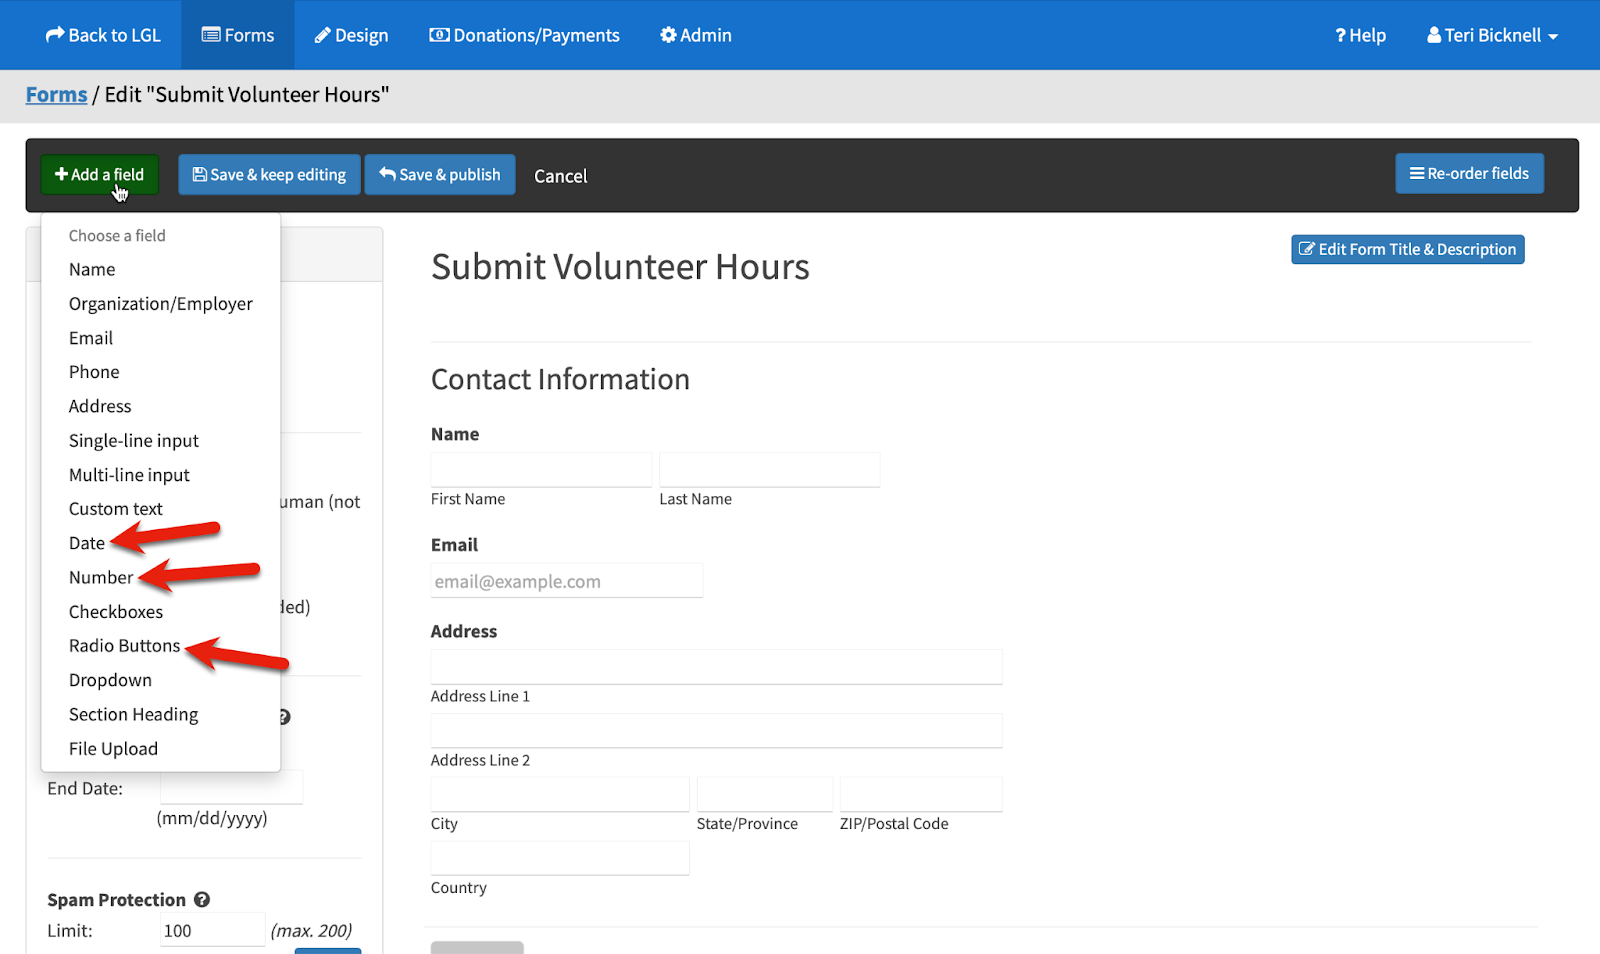
To add each new field to your form, click the Add a field button. Then, one field at a time, add the “Date”, “Number”, and “Radio Buttons” fields to your form. To add each field, first click Add a field and then select the field.
You can then rename the fields so it will be clear to volunteers which information they should type into each one. Here are examples of what you could name each of the fields:
- Date: “Date of volunteering”
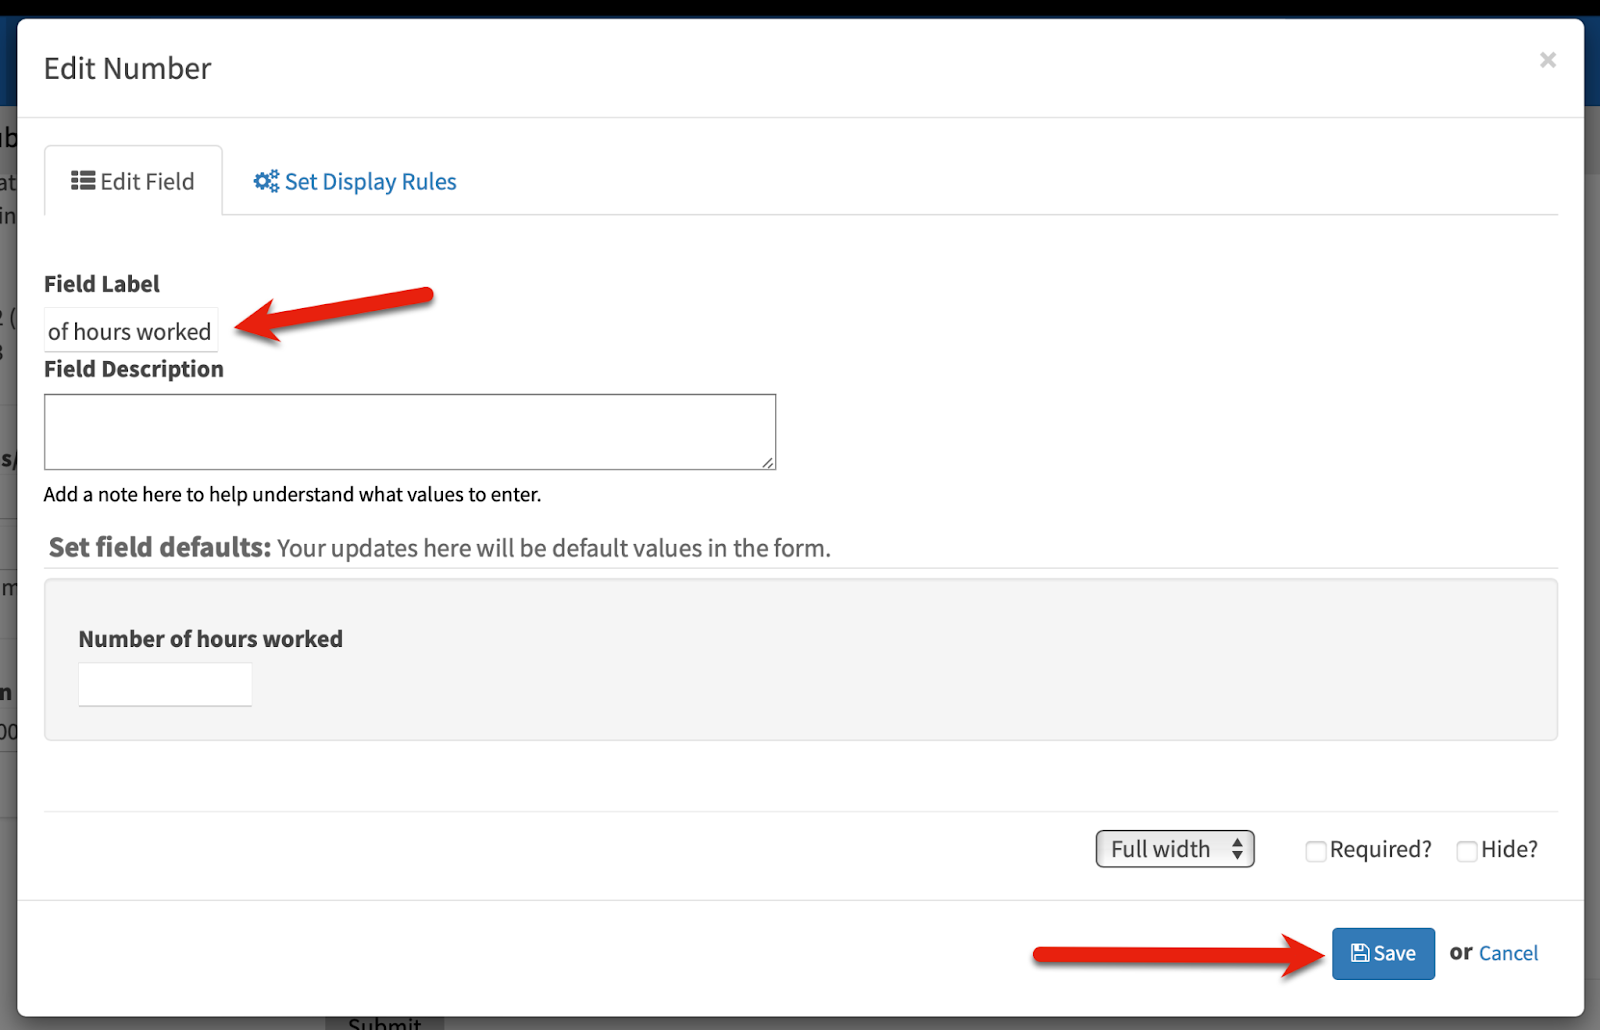
- Number: “Number of hours worked”
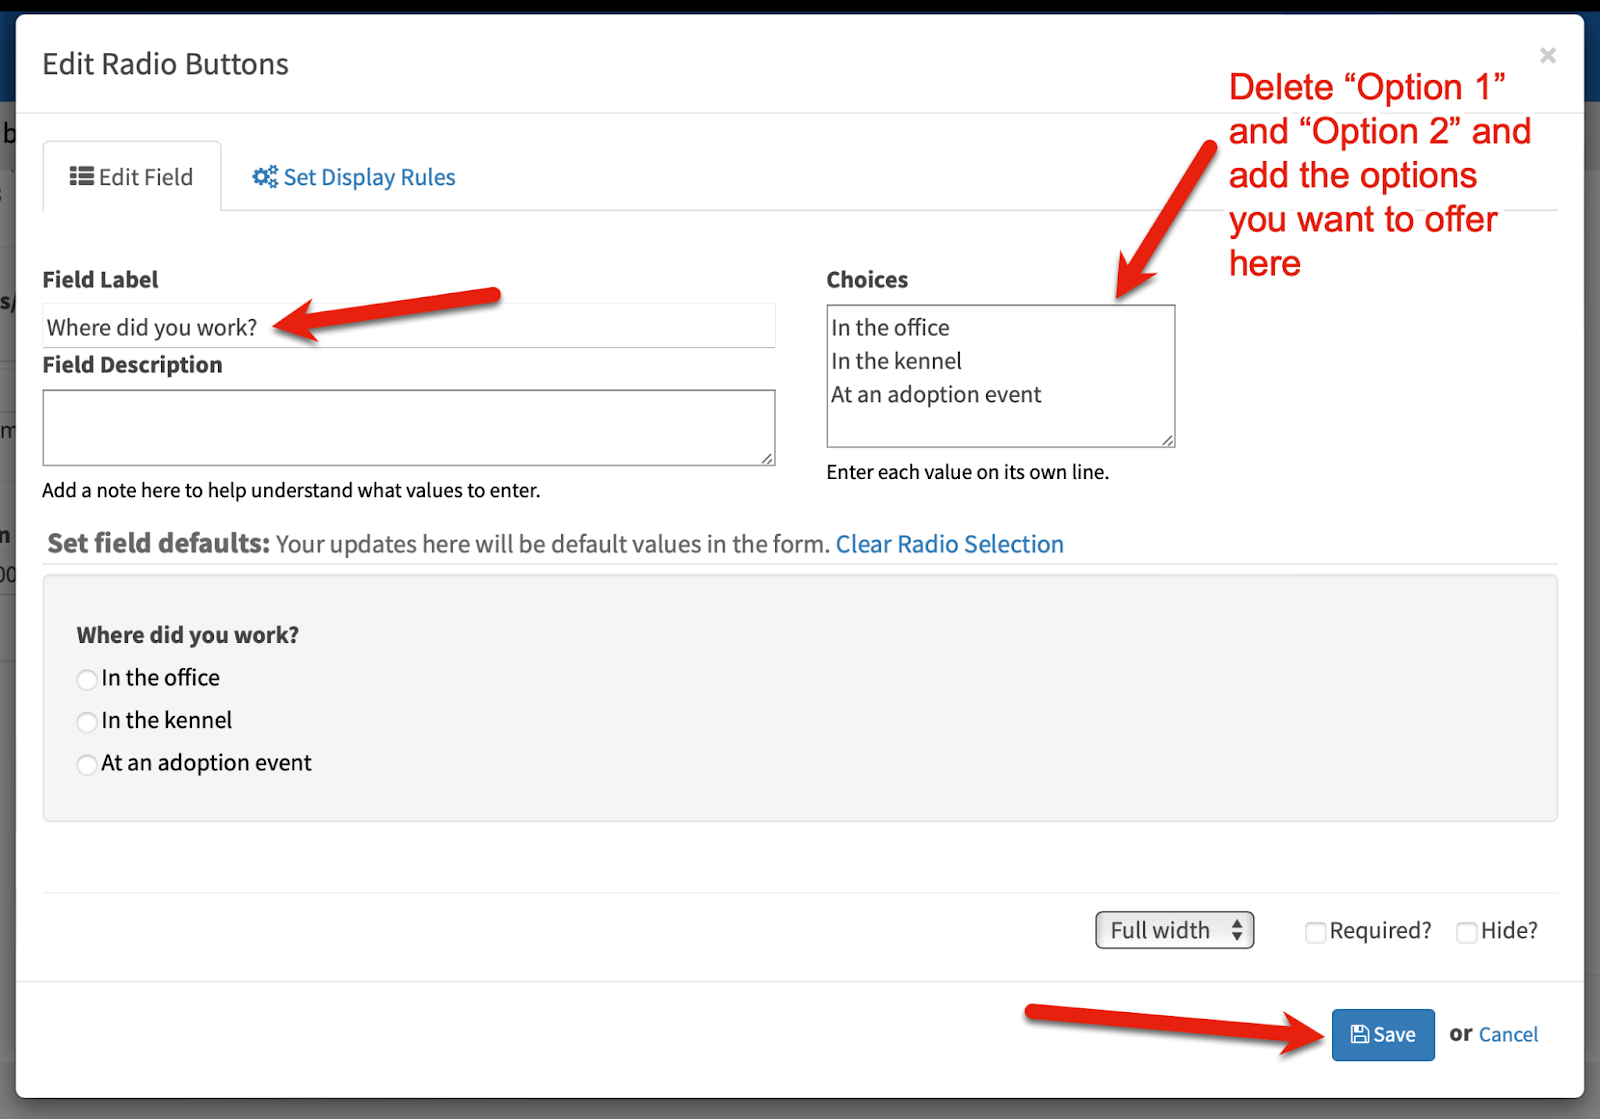
- Radio Buttons: “Where did you volunteer?”
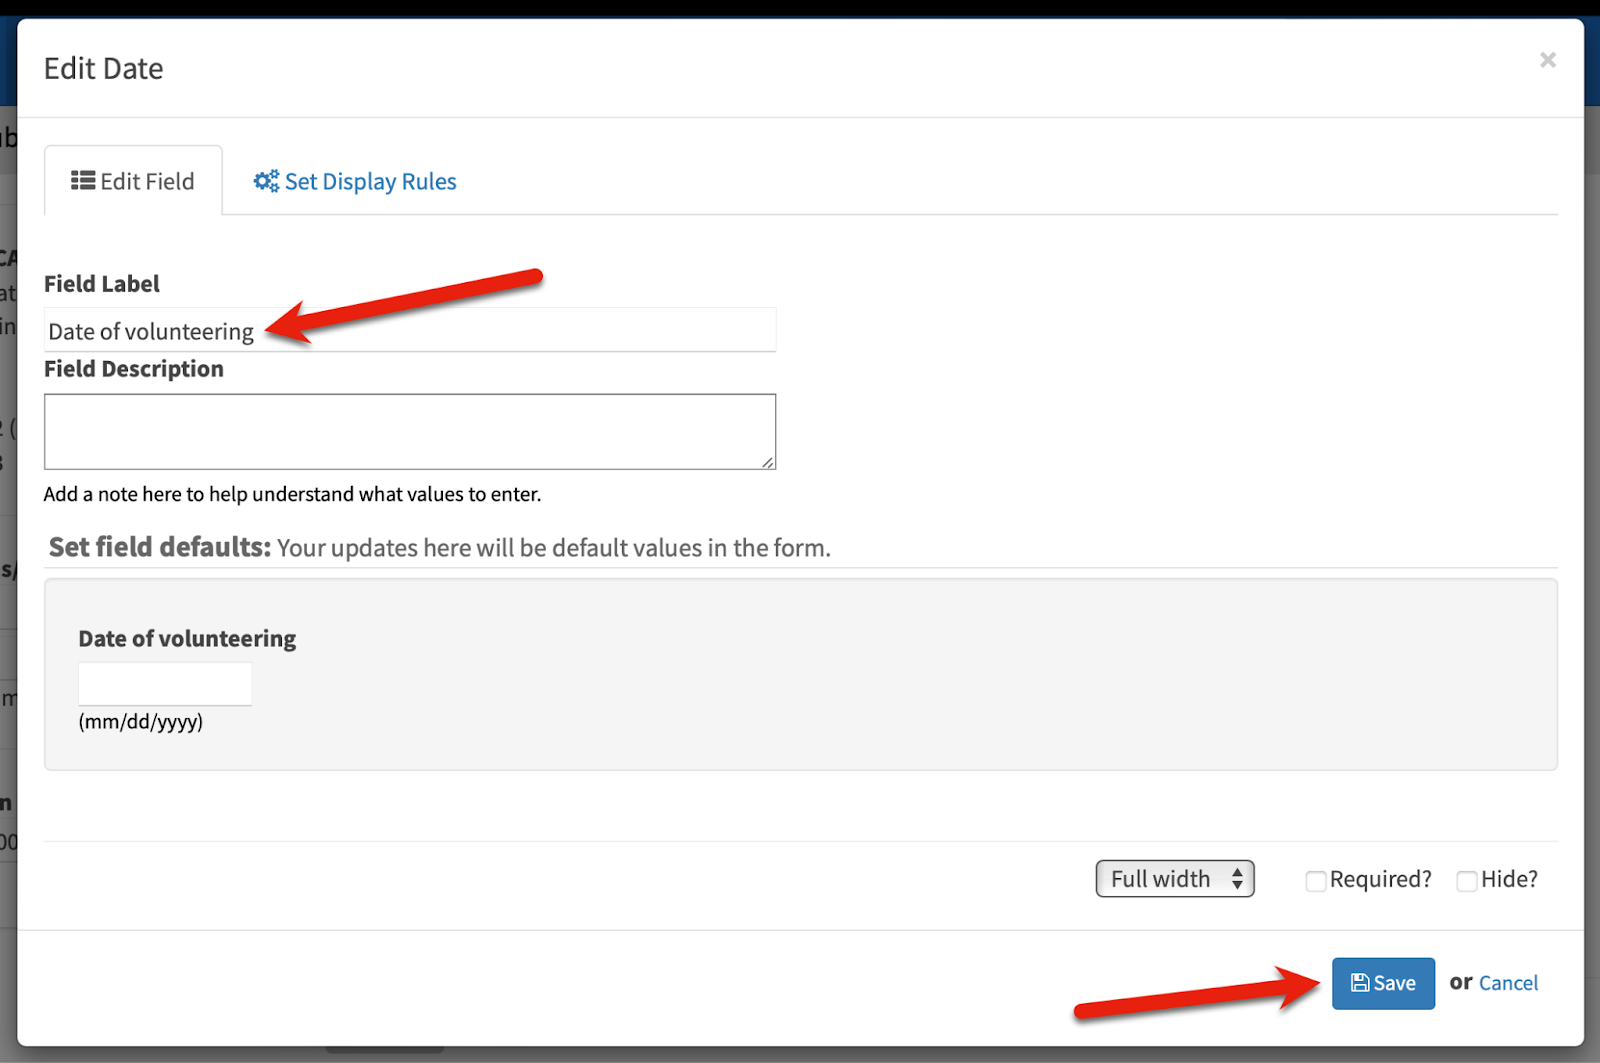
The three screenshots below show how to set up each of the fields as you’re adding it to your form. In each case, update the field label to what you want your volunteers to see when they read the form. Then click the Save button. For the "Radio Buttons" field, you’ll need to add volunteer category values that you have previously set up in your LGL account that you want your volunteers to have the option to select for what they spent their hours working on.
The "Date" field can be used to capture the work date the volunteer is submitting hours for.
The "Number" field can be used to capture the number of hours the volunteer worked.
The "Radio Buttons" field can be used to capture the volunteering category for the hours worked.
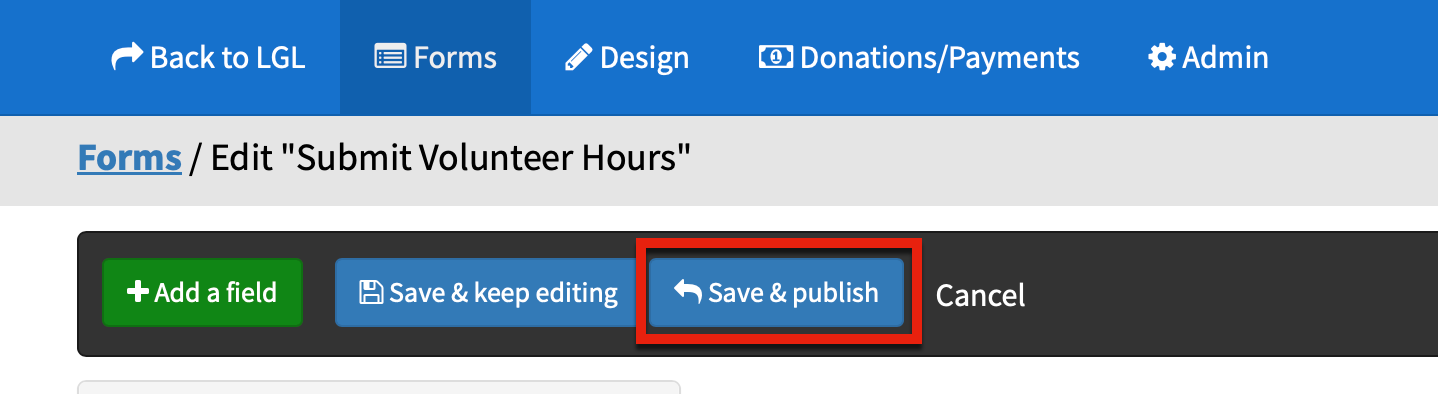
Make sure you’ve saved all your work in the different fields you add to the form. When you’re happy with how the form looks, click the Save & publish button.
Now it’s time to map the fields so data submitted through the form comes into the correct fields in your LGL account.
Map the fields
To map your fields, navigate to the LGL Integration page for your form by clicking one of these options:
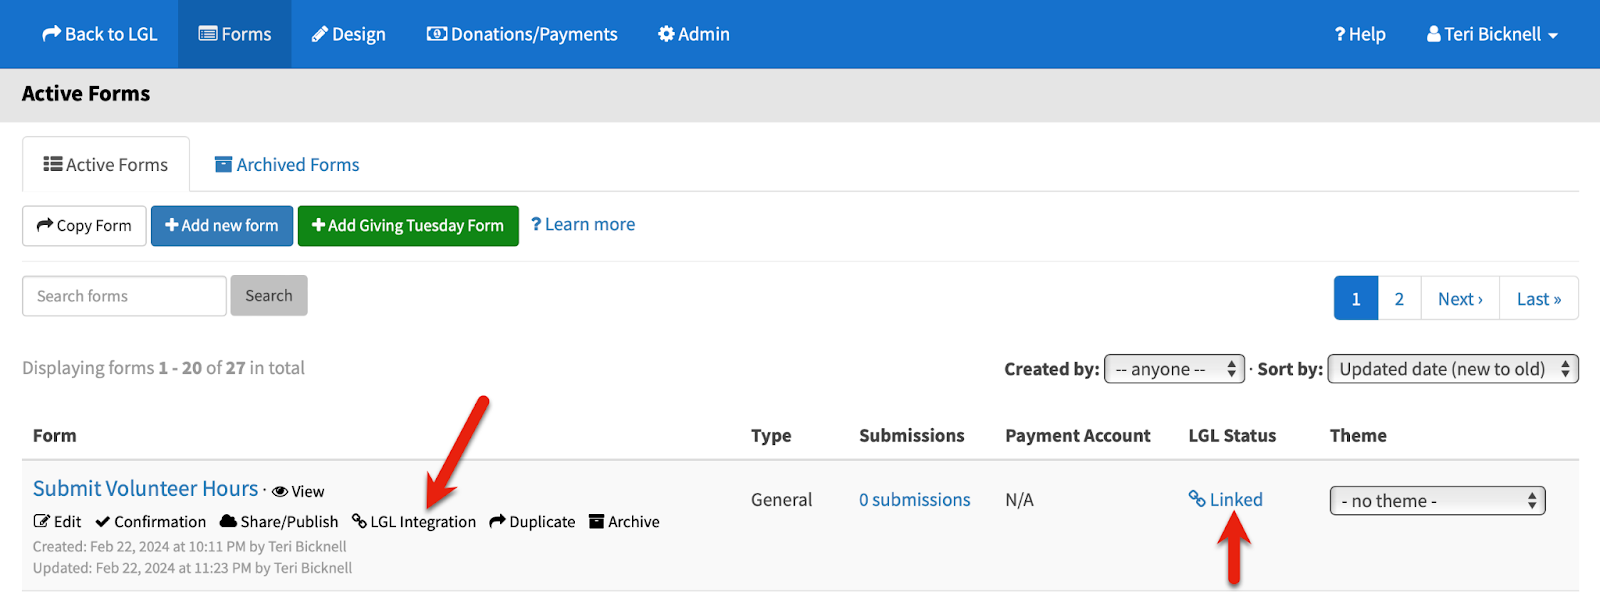
NOTE: If the form has not already been linked, the form’s status will be listed as Unlinked and the page will open where you'll see a Link to LGL button and instructions to click it. Once you click the button, the mapping page will open and you will be able to define the mapping rules as shown below.
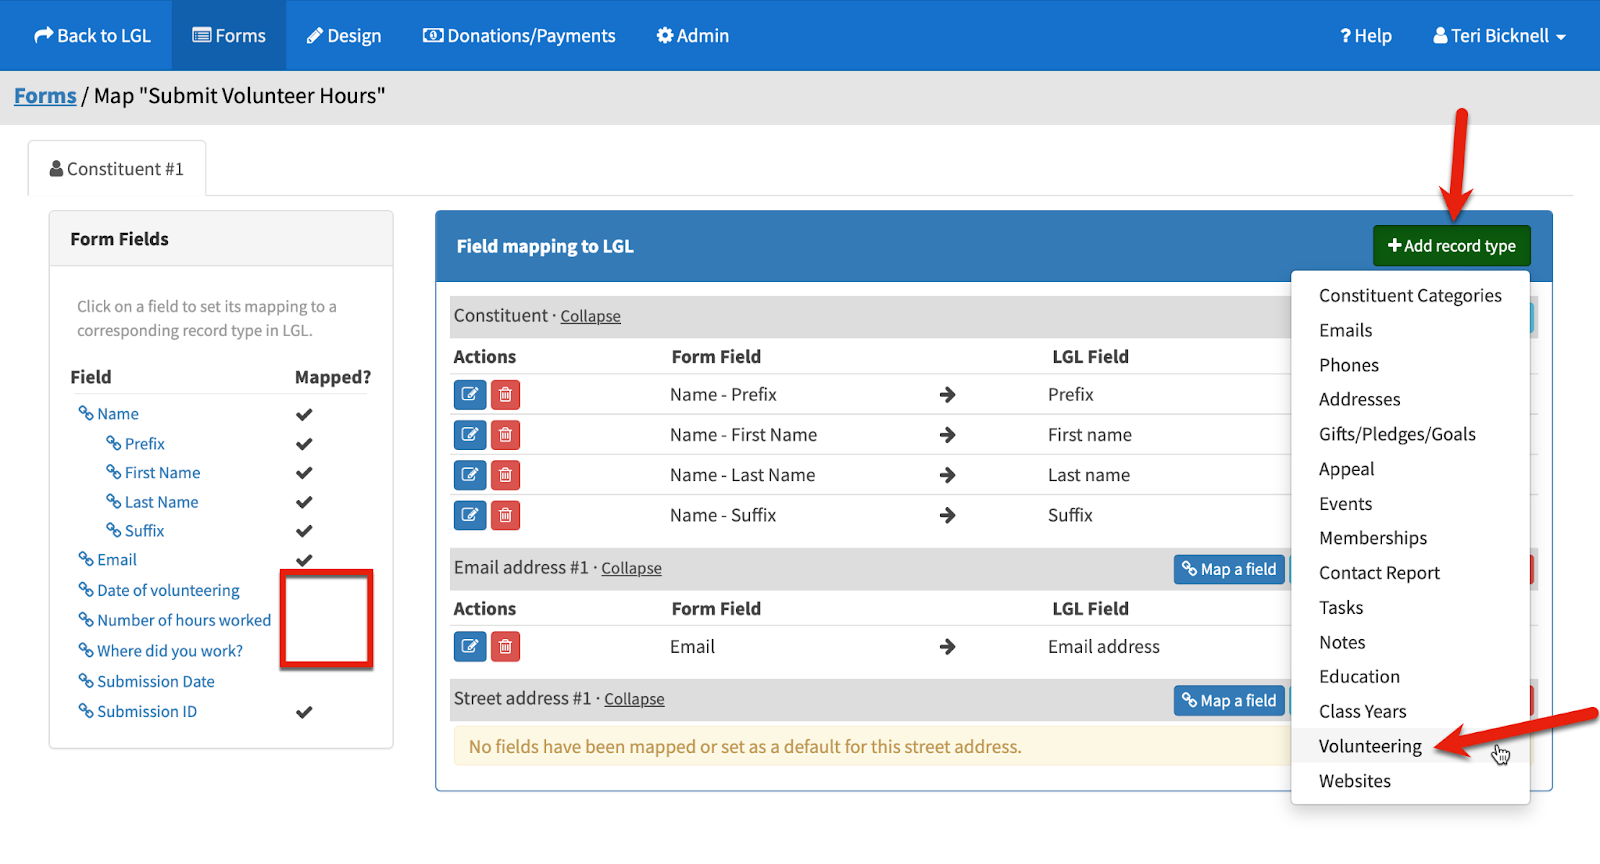
From here, make sure all of your fields are mapped. If they are not, you’ll see some unchecked field names in the left column of the page. Wherever there is an unmapped field, click the Add record type button in the upper right of the page and select the Volunteering mapping.
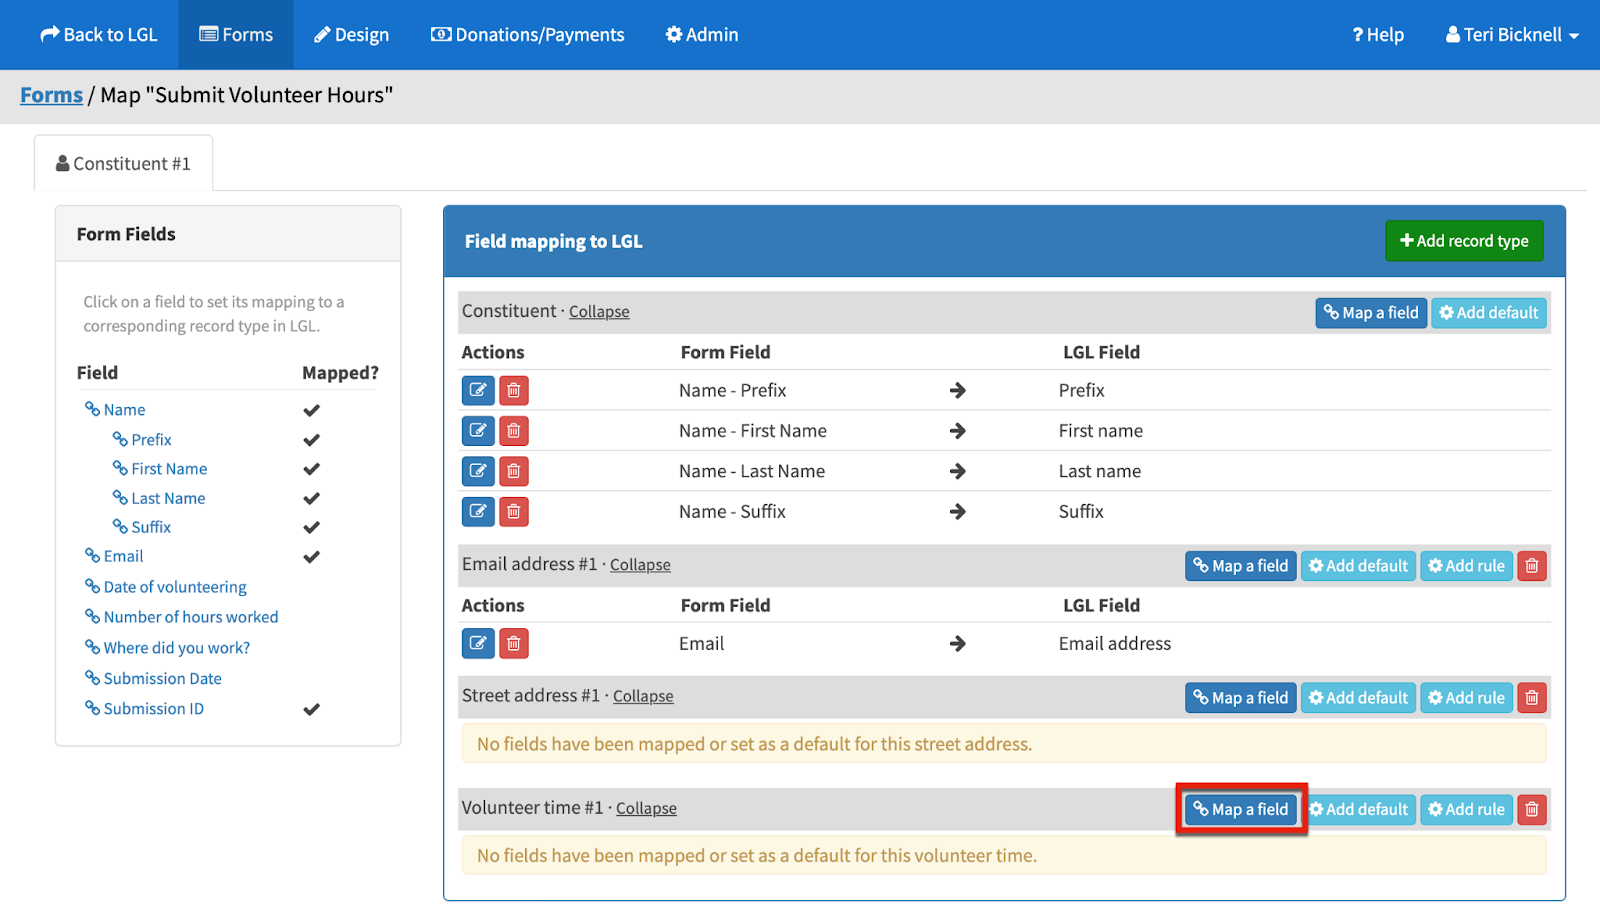
To set up the volunteer field mappings, click the Map a field button within the Volunteer time #1 section of the page:
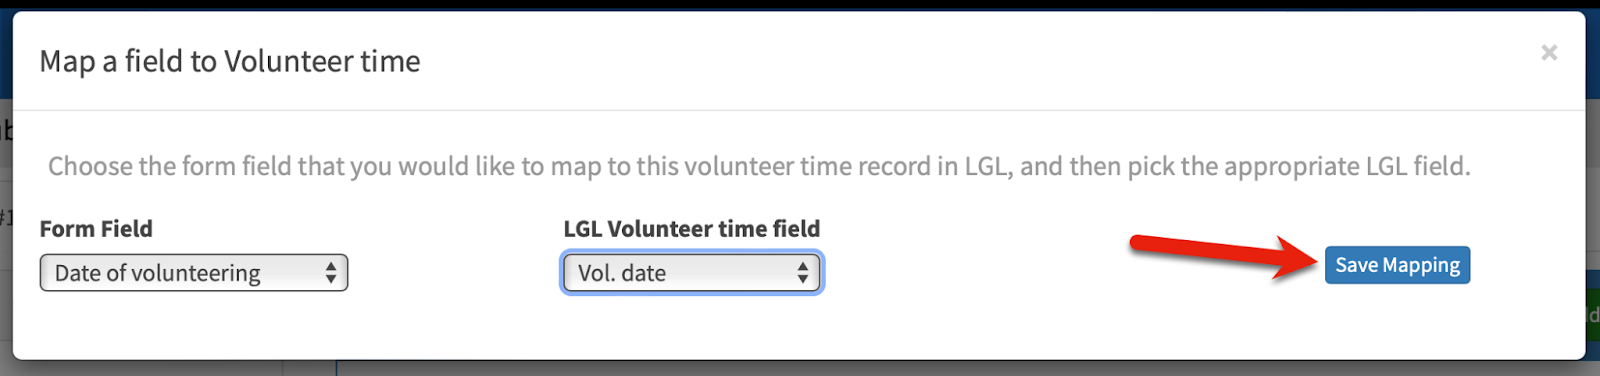
Then set up each field mapping as shown in the following screenshots.
Date of volunteering
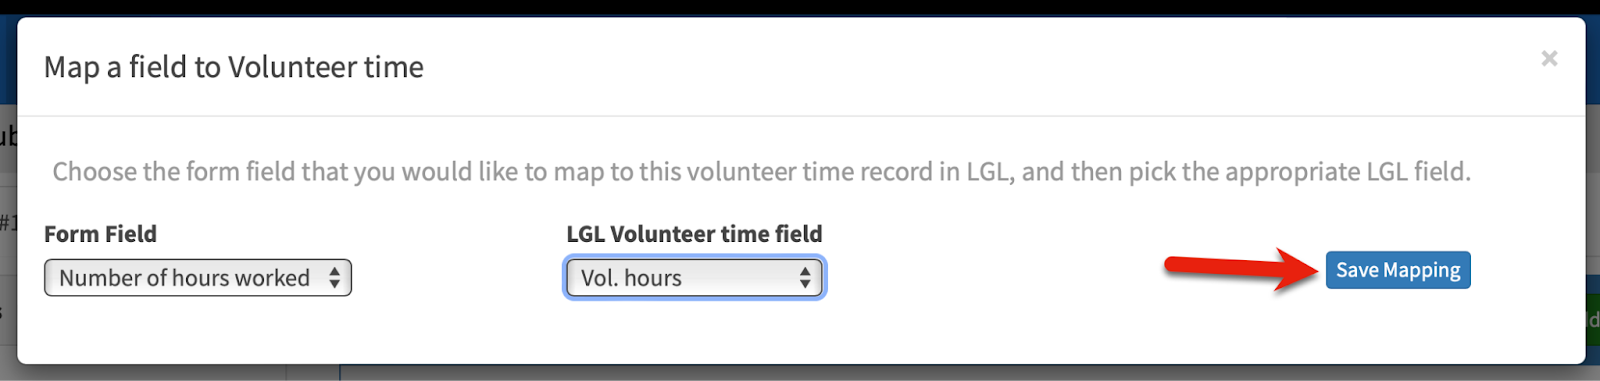
Number of hours worked
Where did you work?
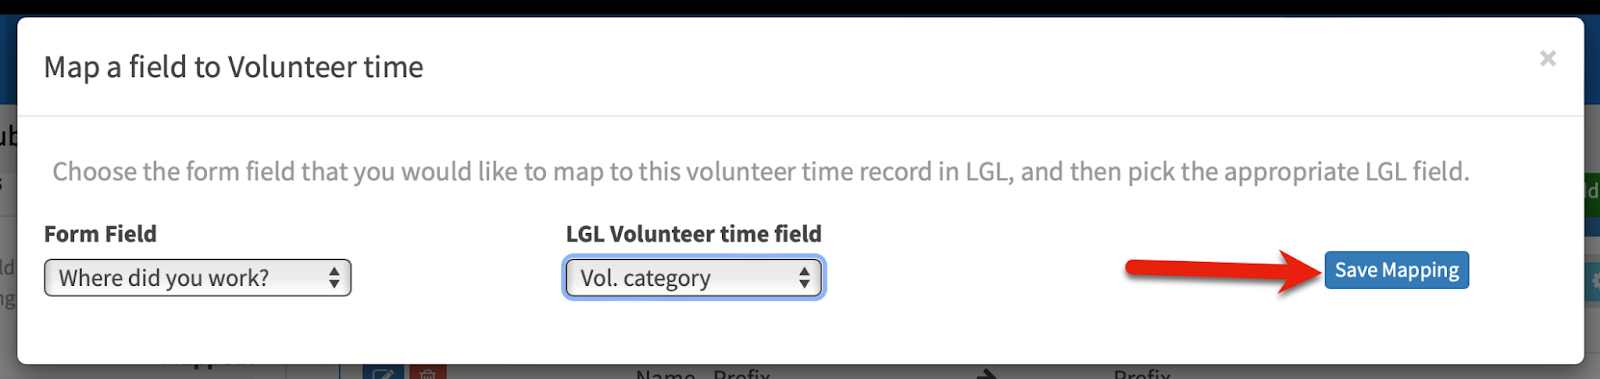
Your volunteer mapping should now look similar to the screenshot below.
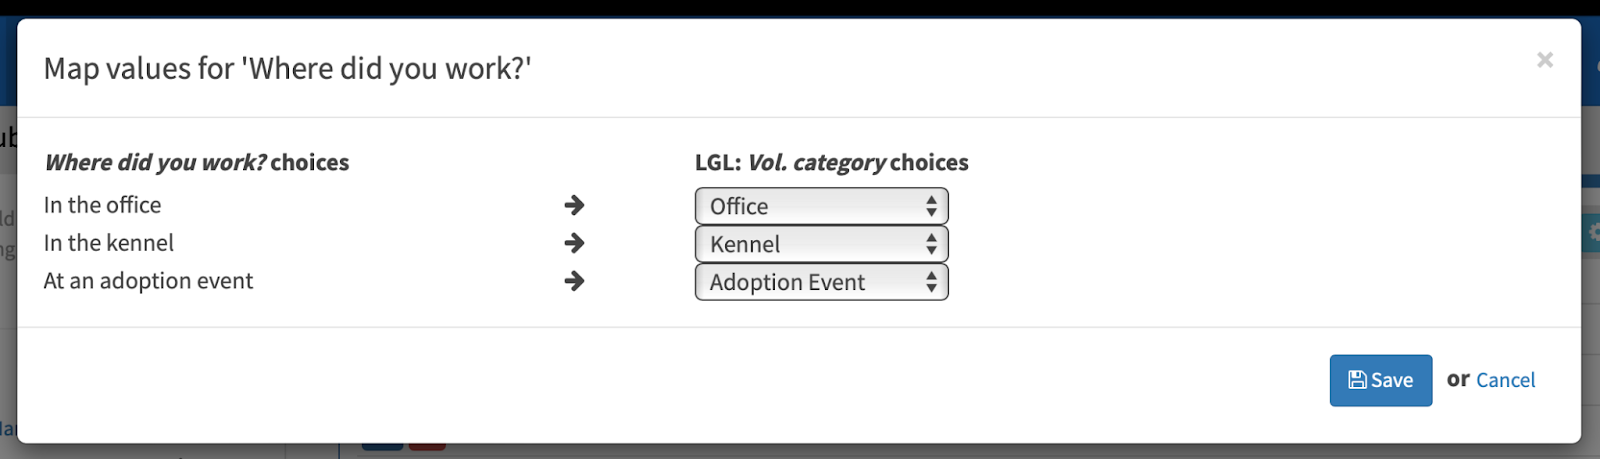
You'll also need to map the values in the “Vol. category” field mapping, so each volunteering category is captured. To map the values, click the light blue button shown here:

Then match up the values as shown here:
NOTE: If you’re assigning the same volunteering category for every submission made through your form, you can set up a default for that category to be assigned instead of mapping the values.
Once you map the fields and before navigating away from the page be sure to select the "Save & Finish" option.
Test your form
We recommend testing your form as a next step. If you notice that any fields didn't map as you expected please let us know and we can review the updated field mappings.