
Events
In this article:
- Introduction
- Adding new events
- Editing and deleting events
- Inactive events
- Cloning events
- Viewing your event data in sortable columns
- Adding constituents to events in bulk
Introduction
NOTE: For basic information about using events in Little Green Light, please view this LGL video. You can also read more about how to manage an LGL event step by step.
As with campaigns and funds, each gift you enter into your LGL account can also be assigned to an event. Additionally, you can add constituents to your event to manage invitations, RSVPs, and attendance.
To view, edit, and add new events, click on the Events link in the Fundraising sub-navigation. This brings up a listing of all your events. From here, you can add new events, edit existing events, or delete any events that are no longer wanted.

Adding new events
To add a new event, click on the Add event button.

Now you can fill out the event form and save it. You can optionally assign an event to a campaign, in which case event assignments made during gift entry can be restricted by campaign. You can also assign an event type, which allows you to classify your events as courses or performances, or differentiate fundraising events from friend-raising events, for example. You can set up your event types in Settings > Menu items > Other menu items.

(The "Code" field above can be used to provide a unique short name, or code, for the event. An example might be if you have an event named "May 20XX Gala" you might have a code of "XXGALA". The code you create can be used in imports to match import data to the correct event. The code is optional.)
After this point, it will be available for use in gift entry and reporting on the Fundraising tab.
Editing and deleting events
As with campaigns, funds, and appeals, events can be edited or deleted from the Events page by clicking on the Actions icon menu next to each event name and then selecting Edit or Delete from the dropdown menu. If you delete an event, all event-related data will be removed from LGL. Gifts coded to the event will remain in your LGL account, but they will no longer be coded to the event.

Inactive events
All events are active by default. You can make an event inactive by editing the event and deselecting the Active checkbox. Inactive events are still usable in gift querying and reporting but will no longer appear when you are entering new gifts. They will also no longer appear among the active events once this box is unchecked.

Cloning events
You have the ability to clone existing events and can choose to preserve the existing custom categories, attributes, and segments from the previous event. To clone an event, click on the name of the event and choose the Clone Event button located in the top-right corner of the page.

Now you can name your new event and choose to retain previous custom attributes, categories, and appeal segments. Then you can save your changes.

Tracking guests
Within a constituent’s event record, a constituent's guest names and total attendee count can be tracked within the invitation details.

If you need to track more detailed data about your constituents’ guests, an optional additional guest tracking setting can be turned on. Please review the knowledge base article When to use the “Additional guests” setting” in your event to determine when this setting should be used.
Viewing your event data in sortable columns
You can choose to view your event's attendees in a column view, which you can customize to show any event-related fields you want.

In the screenshot below, for example, we're showing RSVP status, attendance status, and sandwich choice for the event. Note that each of the available columns is sortable.
Column view

You can compare the new column view above to the previous (classic) view below.
Classic view

Keep in mind that when you view your event data in the Column view versus the Classic view, you'll see filter options that pertain only to the event, rather than to the constituent overall:

Adding constituents to events in bulk
There are a couple of different ways you can add constituents to your event in bulk.
You can bulk add constituents by clicking the Add constituents button within the event.
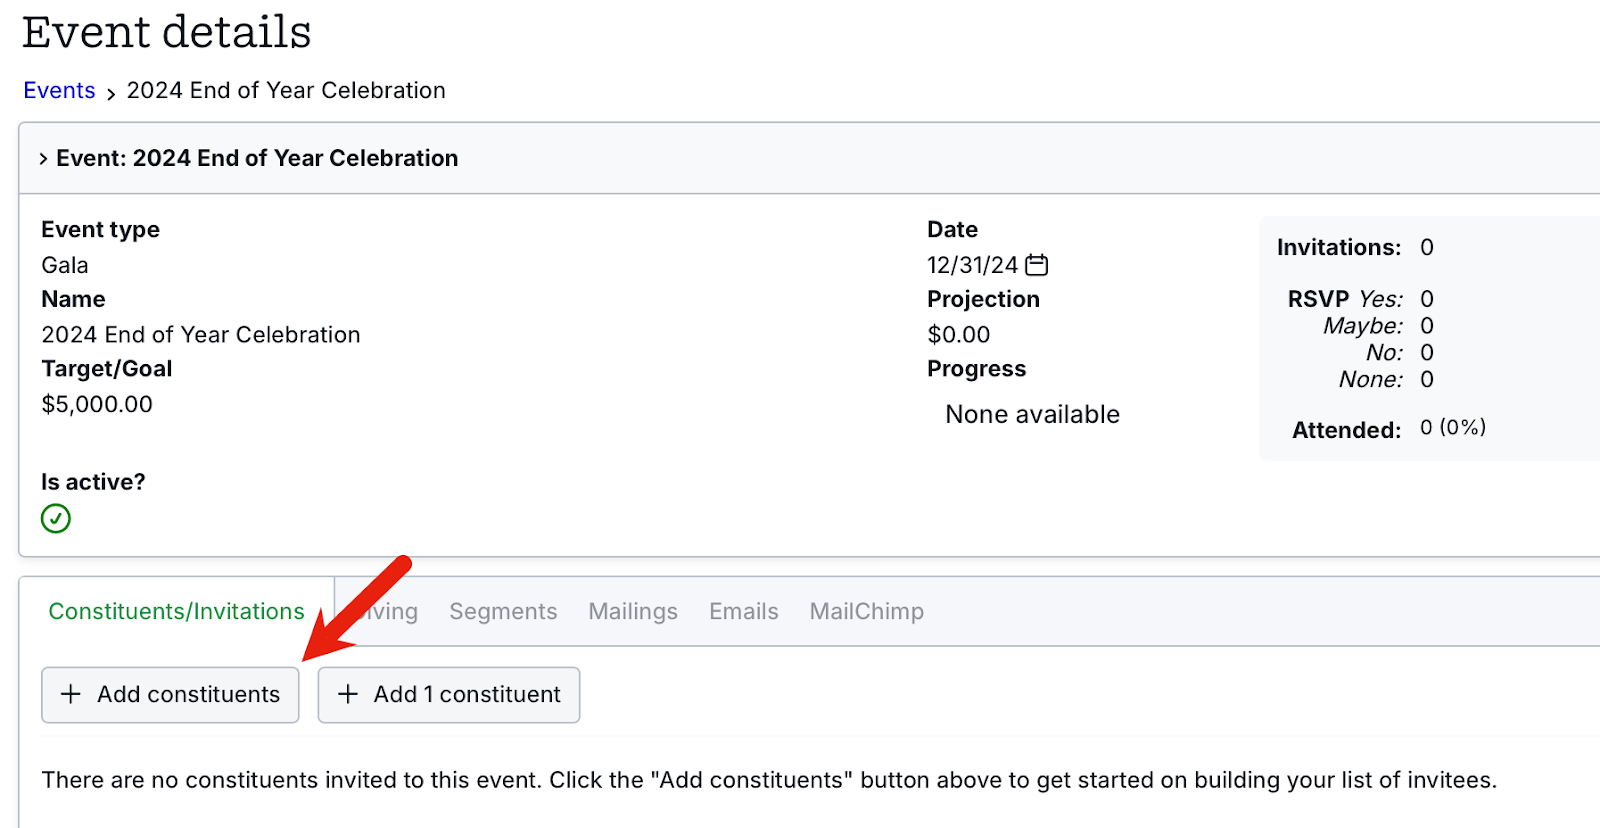
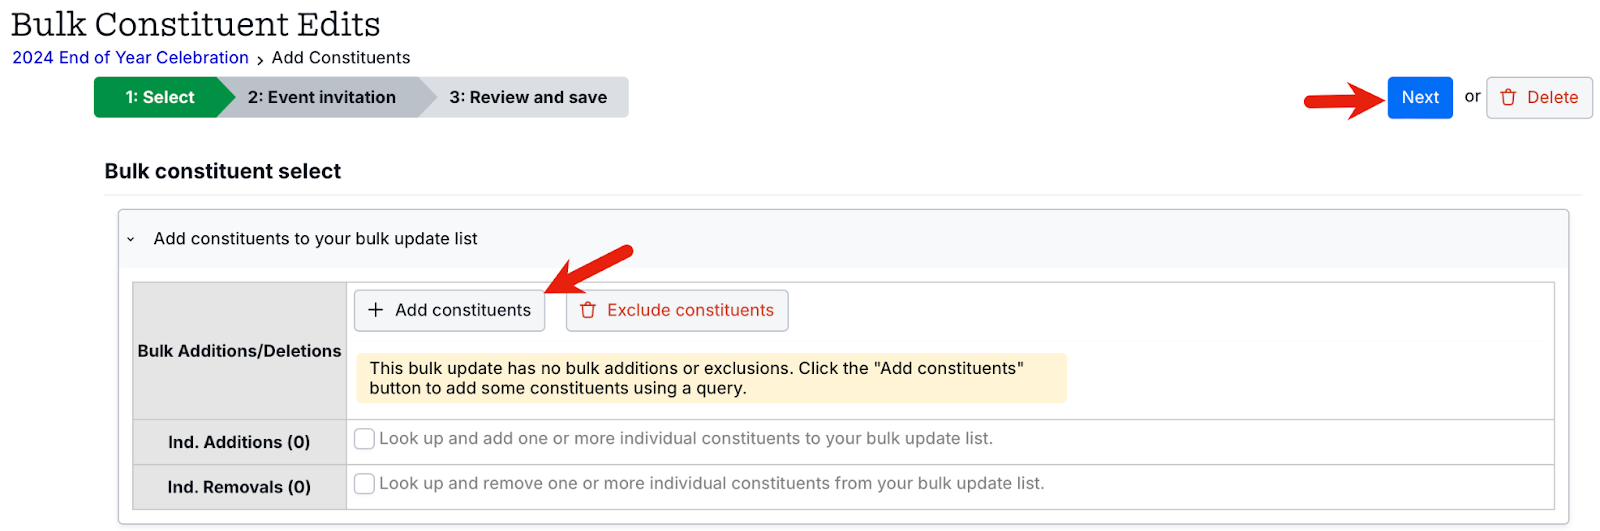
This opens a constituent bulk edit screen where you can select Add constituents to build a constituent search for the constituents you would like to add to your event. Click the Next button when you are ready to bulk update invitation details. Then proceed to the 3: Review and save step to complete the process.
You can also add constituent event invitations in bulk by searching for the records you want to update in the Constituents tab and then selecting the Add/edit event option from the Bulk Updates dropdown menu to add them, as shown here:

You can then select to bulk add data to any field in the event invitation, as shown here:

The final step is to review and save your changes by clicking Step 3: Review and save. Then click the Update records button to save the change:
