
Collect general tributes using LGL Forms
In this article:
Overview
IMPORTANT NOTE: This article assumes that you are familiar with how to:
- Use the LGL Tributes feature to set up a general or named tribute
- Set up tribute notifications to map to in your form (if you plan to send notifications)
The term “tribute gifts” refers to gifts given either in honor or in memory. You can use an LGL form to collect tribute gifts with or without notifications to the honoree or next of kin. The instructions in this article describe how to set up and map a form to accept general honorary and memorial tribute types. When a person is being honored or memorialized and you expect to receive multiple gifts in their honor or memory, you can set up a form to collect gifts to a named tribute to track these gifts and send acknowledgments and notifications for them. (Read instructions for how to handle named tributes.)
Key points to understand before building your form
To ensure you are building a form that will work correctly, follow these guidelines:
- Implement your form as closely to what is shown in this article as possible. (In addition, be sure you are adept at using these basic approaches before attempting any others.)
- Set up your tribute form to accept one-time gifts only (where recurring gifts are disabled). If you want to accept recurring tribute gifts, we recommend creating a separate, simple form specifically for that purpose.
NOTE: If your tribute form does allow recurring donations, any recurring donations will be assigned to the original tribute.
Build your form
Follow these instructions to build your form.
- Start with a payment form that already contains fields for the donor’s name, mailing address, email address, and donation amount.
-
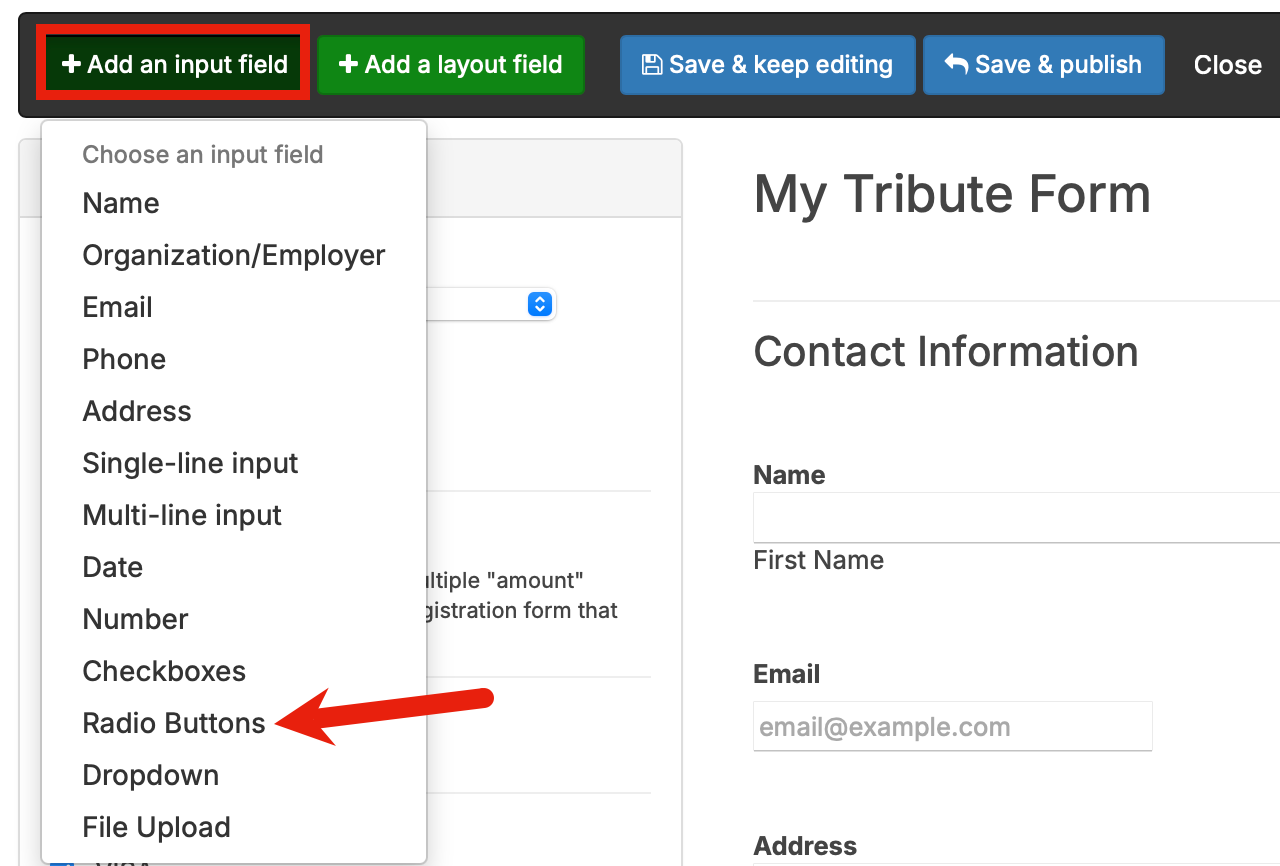
Next add the “Radio Buttons” and “Name” fields necessary for tribute gifts. You can also add optional field types to collect additional information if you plan to include a dedication field in your form and/or send notifications to the honoree or next of kin. The field types, labels, and choices to include in the form are listed below.
The screenshot below shows how to add a “Radio Buttons” type field type to your form:
-
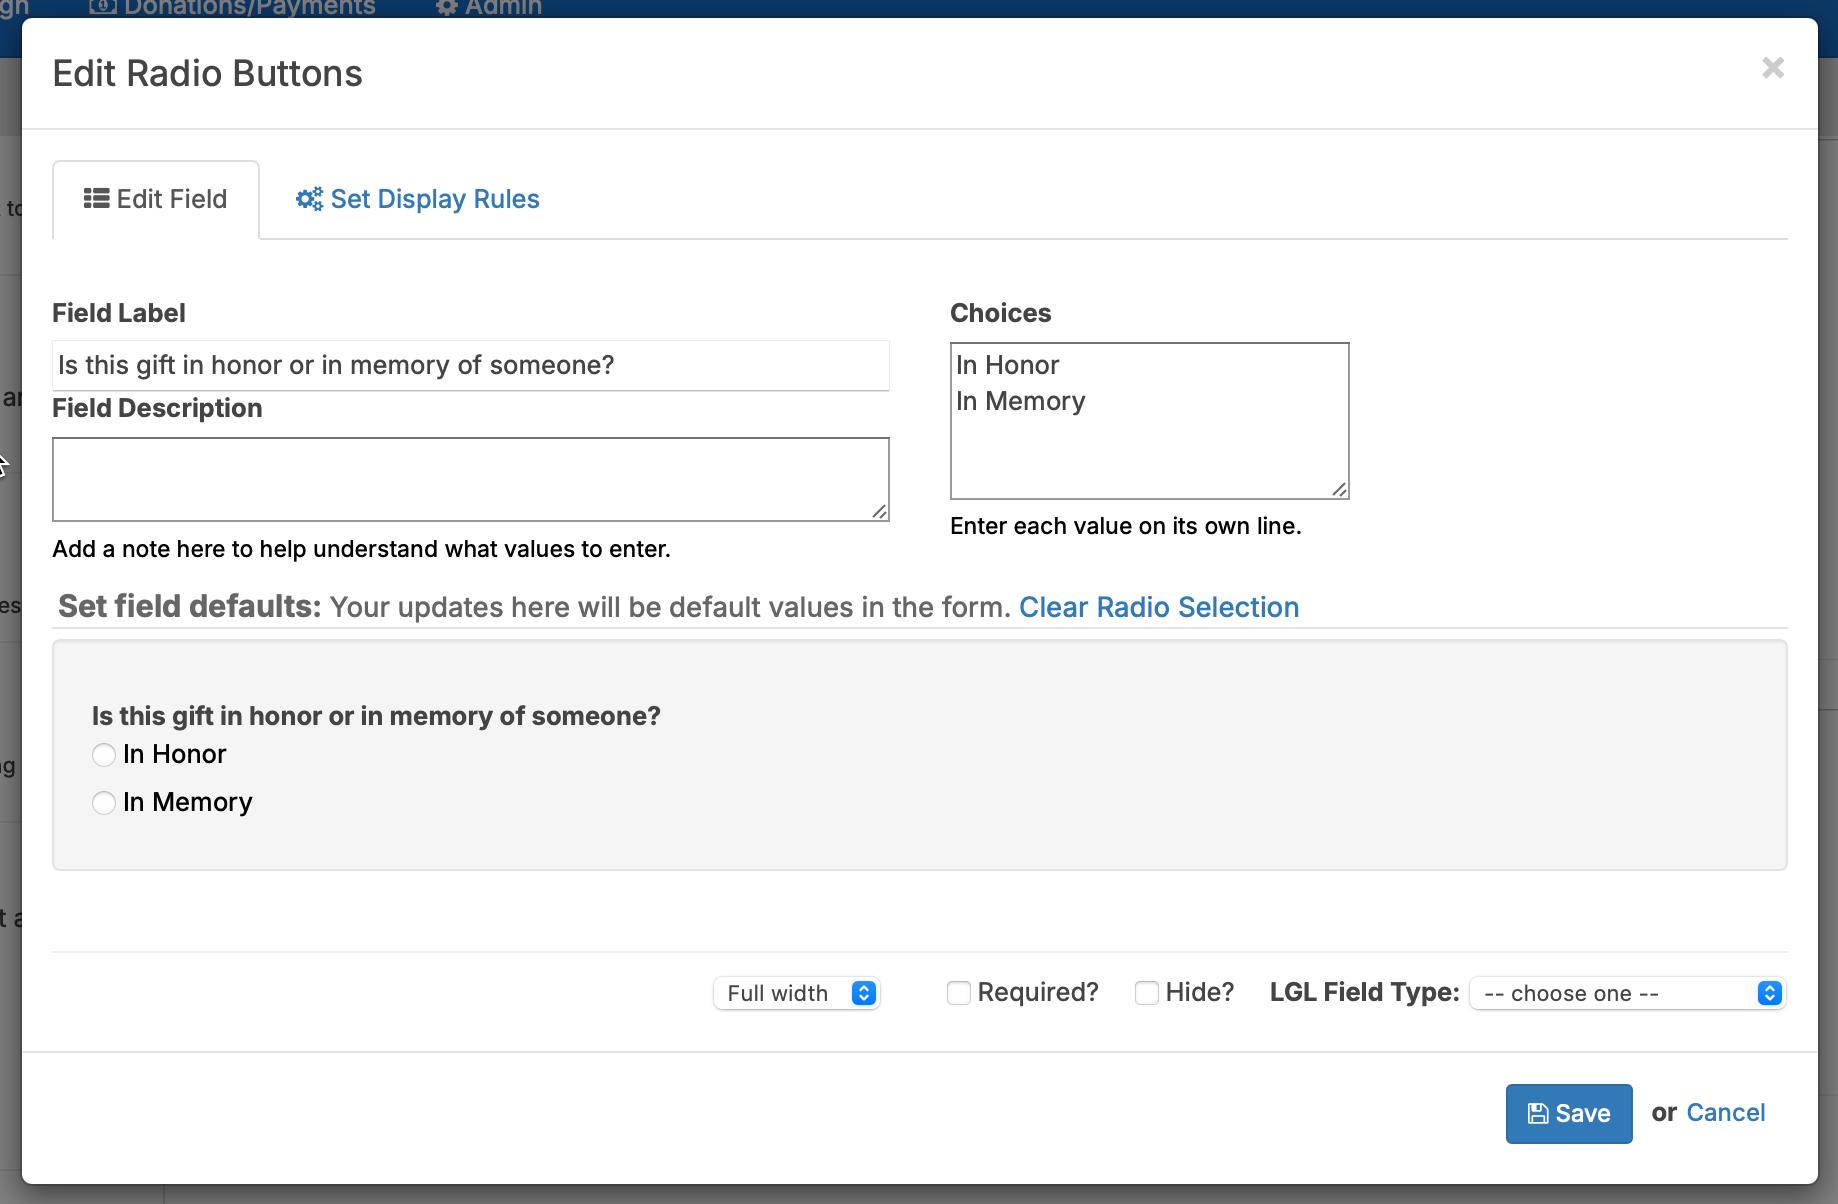
Edit the field label within the "Radio Buttons" field and add the field choices (In Honor and In Memory).
-
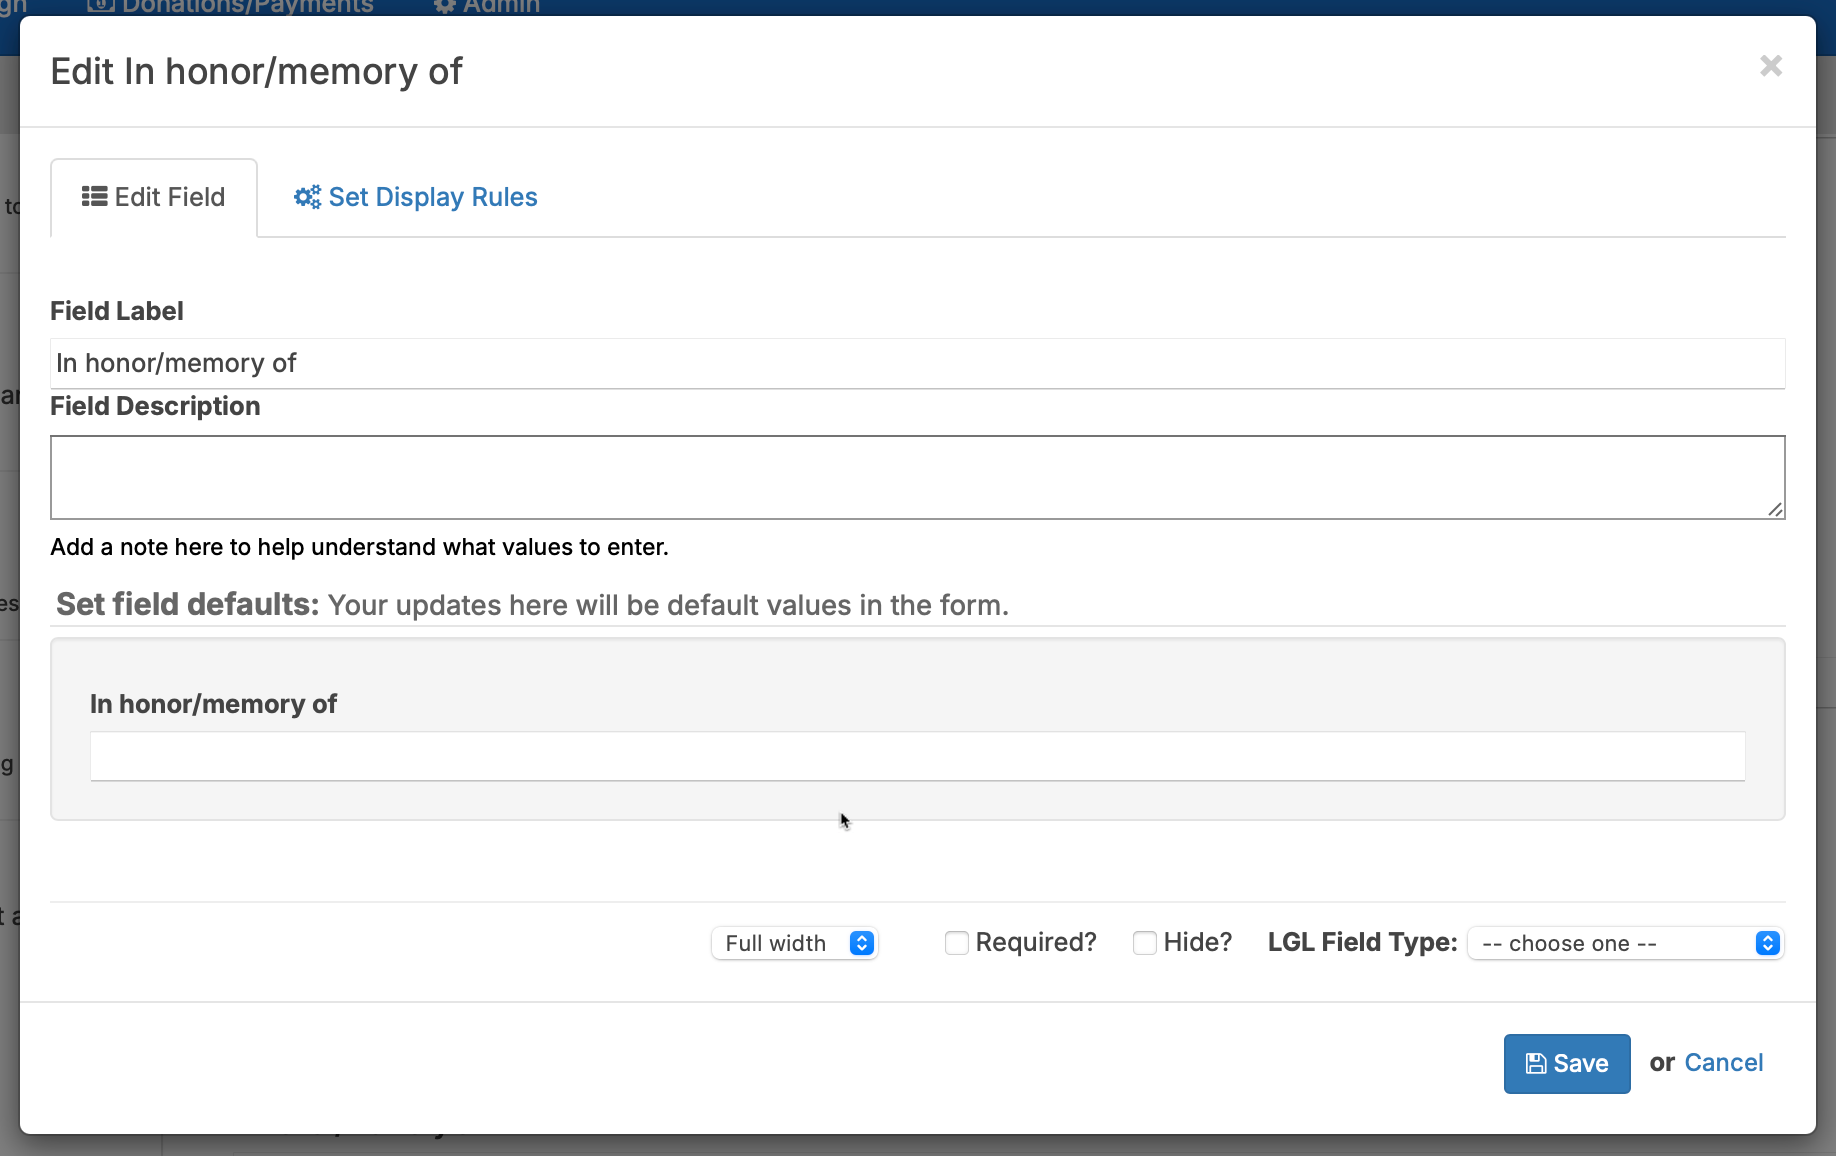
Set the display rules for the "Name" field (a single-input or Name field will work well for this) that collects the In Honor/In Memory of person's name information to display when the user clicks the “In Honor” or “In Memory” radio button:
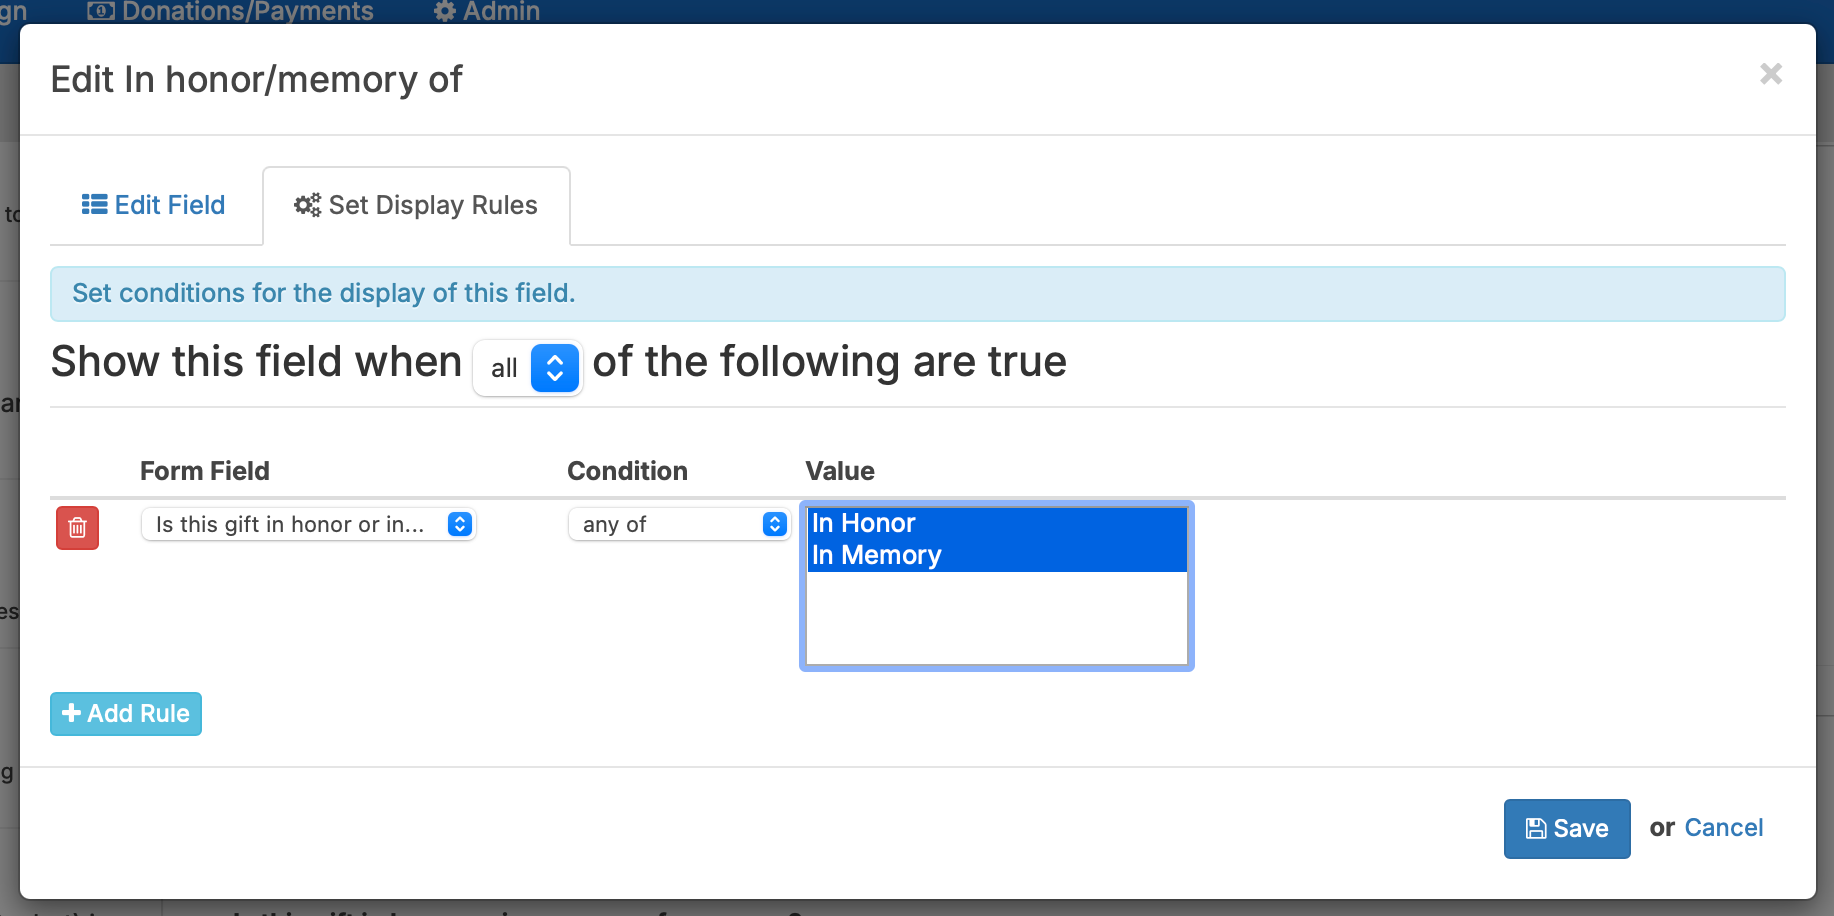
TIP: To select both “In Honor” and “In Memory” as shown in the screenshot above, hold the “Shift” key down, which will allow you to select both.
- Add these same display rules for any remaining fields your form is using to collect the tribute dedication and notification information.


| Field type | Field label | Field choice |
| Radio Buttons | Is this gift in honor or in memory of someone? | In Honor, In Memory |
| Name | In Honor/Memory Of | N/A |
| Multi-line input (optional) | Dedication | N/A |
| Name (optional) | Send notification to | N/A |
| Single-line input (optional) | Salutation of person to be notified | N/A |
| Email (optional) | Email of person to be notified | N/A |
| Address (optional) | Mailing address of person to be notified | N/A |
How your form should look
When you have finished adding your form’s fields and published the form, you’ll be able to preview it from the Forms page by clicking the “View” button, as shown below.

Here’s an example of how the published form will look.

The conditional fields will display if the user clicks either of the tribute options, as seen here:

NOTE: The only fields required to create a tribute form are the “Radio Buttons” field to indicate the gift is in honor/memory and the “Name” field for the person the tribute is honoring/memorializing (you could use a single-line input field for this as well). All other fields are optional based on your organization’s business practices.
Mapping overview
Once the donor’s name and contact information fields have been mapped, you will need to map the gift and tribute data from your form into LGL.
Remember these key points about mapping your form fields:
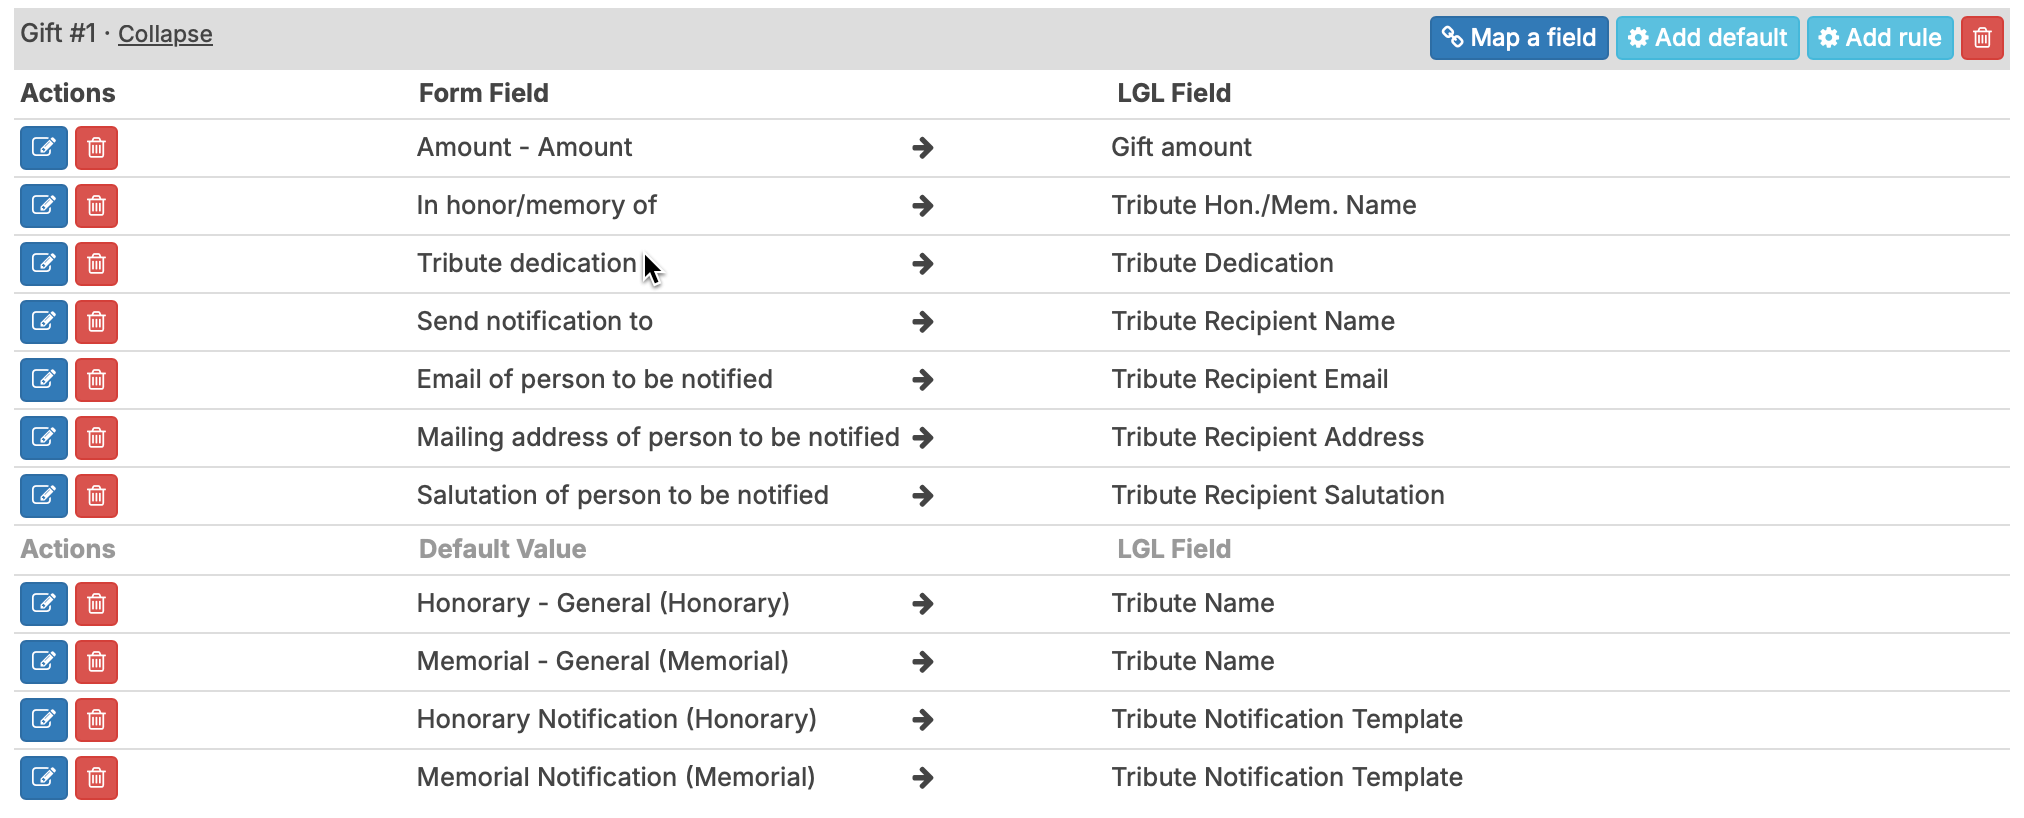
- All mapping related to the tribute is performed in the Gift #1 mapping section.
- The “Tribute Name” and “Tribute Hon./Mem. Name” fields have similar names and can easily be confused with one another when mapping. “Tribute Name” is the name of the tribute you are tracking. Every account includes two default tribute names: “Honorary - General” and “Memorial - General”. The “Tribute Hon./Mem. Name” field is used to identify the name of the actual person being honored or memorialized.
- Take note of defaults that are using “only apply if” rules. (NOTE: The assigned values depend on the options offered in your form and are case-sensitive).
- See this help article for instructions on adding a default to your form’s mapping.
- If you are including notification fields in your form, you need to have previously set up notification templates in your LGL account so that the “Tribute Notification Template” fields are available to map to in the defaults you will add.
How to map your form
NOTE: You can see how your form’s mapping should look when complete in Step 7 below.
- In the “Gift #1” mapping, map the “Amount” form field to the LGL “Gift amount” field.
- Map the field collecting the name of the person being honored or memorialized to the LGL “Tribute Hon./Mem. Name” field.
- Map the tribute dedication field from the form to the LGL “Tribute Dedication” field.
- If your form is collecting tribute notification data,
- Map the form field that collects the name of the person to be notified to the LGL “Tribute Recipient Name” field.
- Map the field collecting the salutation of the person to notify to the LGL “Tribute Recipient Salutation” field.
- Map the field collecting the email of the person being notified to the LGL “Tribute Recipient” field.
- Map the field collecting the mailing address for the person to be notified to the LGL “Tribute Recipient Address” field.
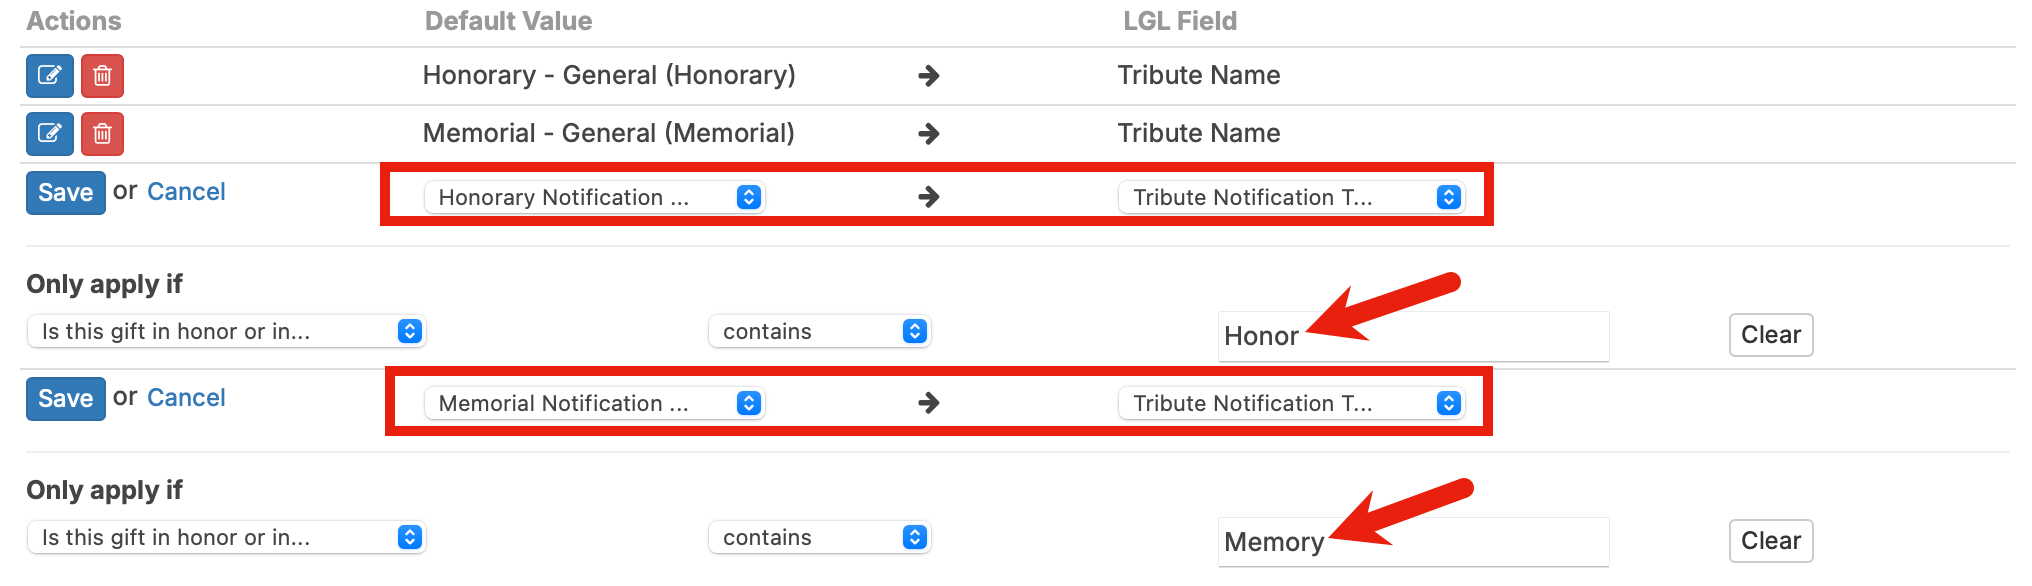
- Next add default values to set the tribute type as honorary or memorial based on the user’s selection in the form. To add the defaults, click the “Add default” button in the “Gift #1” mapping. Set the default for the “Tribute Name” field to “Honorary - General (Honorary)”. Set the rule to apply when the form field “Is this gift in honor or memory of someone” contains “Honor.” Save the new default rule.
-
Select the “Add default” button in the “Gift #1” mapping again. This time set the default for the “Tribute Name” field to “Memorial - General (Memorial)”. Set the rule to apply when the form field “Is this gift in honor or memory of someone” contains “Memory.” Save the new default rule.

-
To set default notification templates, select the “Add default” button in the “Gift #1” mapping. Select the default template for honorary tributes and set it to apply when the field contains “Honor.” Use the “Add default” button in the “Gift #1” mapping to add a second default template for memorial tributes that applies when the field contains “Memory”.
-
When your tribute gift mapping is complete, it should look like this:
- Save and finish your form mapping. Be sure to test your form to make sure the mapping works as expected.


